 Direkt zum Inhalt
Customer Support Center
Installation
Installing the bidet attachment is a straightforward DIY process that usually takes 15-20 minutes. You won’t need a plumber – just a few basic tools (a flat-head screwdriver and an adjustable wrench or pliers). Follow these general steps:
- Turn off the water supply to your toilet. This is usually done by closing the shutoff valve on the wall. Then flush the toilet to drain the tank (it doesn’t need to be completely empty, but lowering the water helps avoid spills).
- Remove your toilet seat. Unscrew the two bolts at the back of the seat and take the seat off. Keep the bolts and nuts handy – you will reattach the seat over the bidet.
- Place the bidet attachment on the toilet bowl, aligning its adjustment slots with the seat bolt holes. The control knob should sit on the right-hand side (when you are seated on the toilet).
- Reinstall your toilet seat over the bidet attachment. Put the seat bolts through the bidet attachment and the toilet’s holes, then tighten the nuts underneath to secure the seat and attachment together. (If your toilet uses top-mounted bolts that don’t have nuts underneath, you may need to use the same expanding anchors or get longer ones so the seat can accommodate the extra thickness of the attachment.)
- Install the T-valve (T-adapter) at the toilet’s fill valve under the tank. First, unscrew the water supply hose from the bottom of your toilet tank’s fill valve (the place under the tank where the hose connects). Attach the T-valve to the fill valve threading – hand-tighten it first and then give it an extra quarter turn with a wrench. **Be sure to insert the provided rubber washer** into the T-valve connection to the tank (this creates a watertight seal).
- Reconnect your water supply hose to the bottom of the T-valve. The T-valve now splits the water flow – one side goes back to your toilet tank (through the fill valve as before) and the other side will connect to the bidet.
- Connect the bidet’s braided hose to the side outlet of the T-valve and then to the inlet on the bidet attachment. Ensure that each end has a rubber washer in place before connecting. Hand-tighten the connections firmly (do not overtighten, as that can deform washers; snug plus a small turn with a wrench is enough). If any connection is metal-to-metal and leaks when tested, you can apply a bit of plumber’s Teflon tape on the threads and retighten.
- Turn the water supply valve back on gradually. As the tank refills, check all connections for leaks. If you see any water seeping at the joints, turn off the water and tighten the connection a bit more. When everything is leak-free, your installation is complete.
Once installed, test the bidet by turning the control knob gently to each spray mode while sitting on the toilet (or hold the spray guard down to test briefly if not seated). You should see water spraying from the nozzle(s) into the bowl. Remember to turn the knob back to “off” after testing. If you encounter any issues during installation, double-check that all washers are in place and all fittings are properly tightened. Installation is designed to be user-friendly, so most people can do it themselves. However, if you’re uncomfortable with these steps or run into difficulties, you can consult a handyman or plumber for help (though it’s usually not necessary).
Our bidet attachments are made to fit standard toilets, but there are a few situations where you might need extra parts or adjustments:
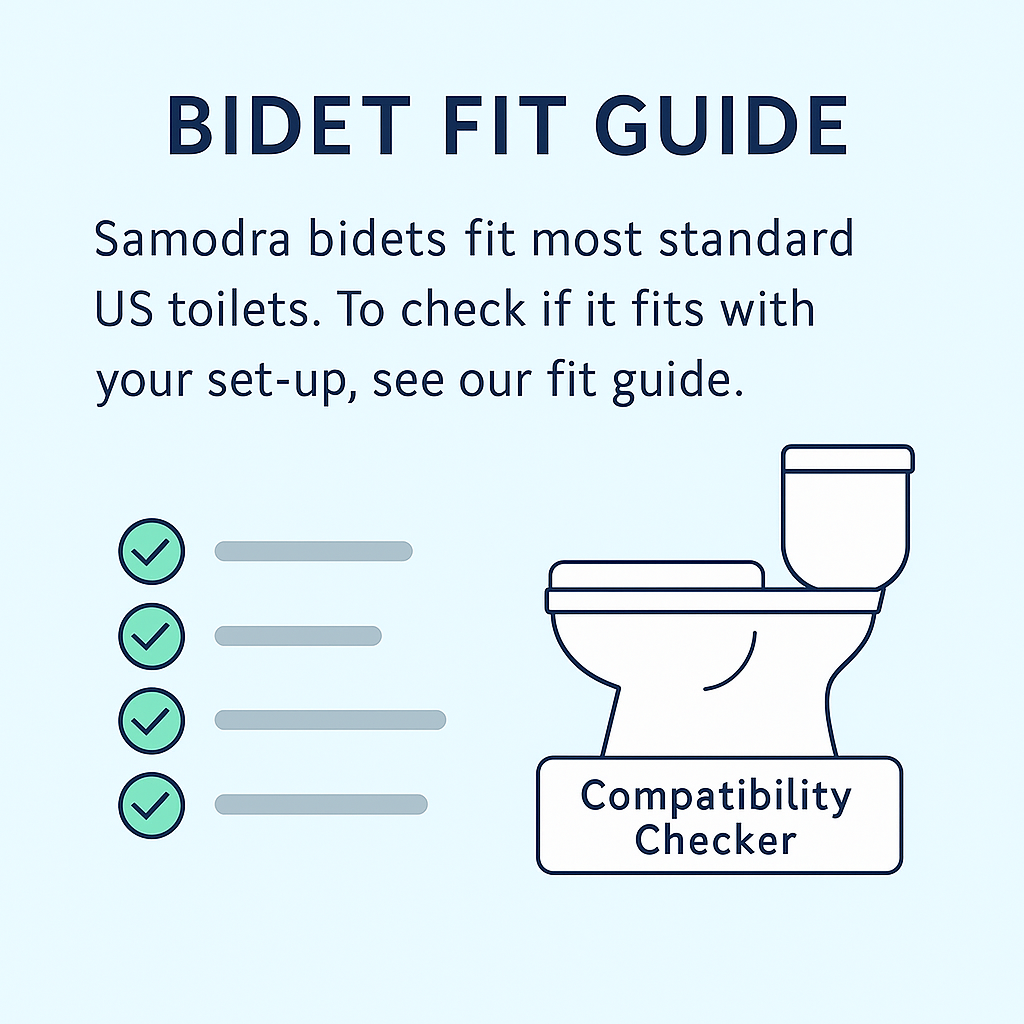
- Toilet Compatibility: The attachment is designed for standard two-piece toilets (where the tank is separate from the bowl). It also works on most one-piece toilets, but very few one-piece designs with a curved or French-curved tank may not have enough clearance for the attachment. If the area around your seat bolts is very narrow or oddly shaped, installation could be tricky. In most cases, it fits fine as long as there’s a little flat space around the bolt holes. The mounting brackets are adjustable to accommodate different bolt spreads (typically anywhere from about 5 to 7.5 inches apart, which covers most toilets). If you have an unusual toilet model or a top-mount bolt system (no access underneath to tighten nuts), you can still install the bidet — just use the existing anchors or obtain a top-mount hardware kit if needed to secure the seat and attachment.
- T-Valve Size: The included T-valve (the T-shaped adapter) has 7/8” connections, which is the standard size that connects to the bottom of a typical toilet fill valve in the US (and many other regions). If your toilet’s fill valve or water supply line uses a different size (for example, 3/8” or 1/2” in some non-US plumbing systems), you might need a different adapter. We provide the standard T-valve with our bidet. Should you find it doesn’t fit your plumbing, please contact our customer support – we may be able to send you a compatible adapter for your region, or you can find a suitable adapter at a hardware store.
- Hose Length: The package includes a braided metal hose of standard length (usually about 2 feet / ~60 cm, depending on model) to connect the T-valve to the bidet. This length suffices for most installations where the toilet’s water supply connection is near the tank. If you discover that the provided hose is too short for your setup (for instance, if your water supply outlet is further away or you have an atypical plumbing layout), you have a couple of options. You can request a longer hose from us (we have longer replacement hoses available), or you can use any standard flexible toilet supply hose from a hardware store to bridge the distance. Just ensure it has the correct 1/2” or 3/8” ends to connect between the T-valve and the bidet inlet. Conversely, if the hose is too long and creates a loop, you can gently bend it out of the way behind the toilet or obtain a shorter hose if you prefer a neater look.
- Left-Handed Installation: The bidet attachment is generally designed with the control knob on the right side (when you’re seated), because most toilet supply lines come in on the left side, making right-side controls more universal. If you absolutely need the controls on the left side (due to bathroom layout or personal preference), note that most of our models do not flip to the left by default. However, we do have certain models (or regional versions) that come in a left-handed design. If you require a left-hand control bidet, please check if our catalog offers a left-handed version of that model or contact us – we may be able to provide a solution or an alternative model that suits your needs.
- RV or Camper Use: Planning to install in an RV or mobile home? The bidet can work on RV toilets as long as the plumbing connections are compatible. Many RVs use a 1/2” or 3/8” connection, so you might need a different T-adapter size as noted above. Additionally, water pressure in RVs is often lower than household pressure – the bidet will still work, but the spray strength might be a bit less. Also, remember to fully drain and winterize the bidet (like the rest of your plumbing) if your RV will be exposed to freezing temperatures, to prevent any water from freezing inside the unit.
If you’re ever unsure about compatibility, feel free to reach out to us with details of your toilet model or plumbing, and we’ll gladly help figure out the best solution. In summary, our bidet attachments are designed to be universally adaptable, but there are fixes (different adapters, hoses, or parts) for those rare cases where things don’t immediately fit. We’re here to assist you in getting everything set up correctly!
Click on these links to download them.
Samodra Minimalist:
PDF Installation Instructions
Watch Minimalist Installation Video
Samodra Button:
PDF Installation Instructions
Watch Button bidet Video
Samodra Button Pro:
PDF Installation Instructions
Watch Button Pro Installation Video
Samodra Twist:
PDF Installation Instructions
Watch Twist Installation Video
Samodra SPA:
Returns & Refunds
If you need to return a product or seek a refund, we have a straightforward return policy to help you. For purchases made through our official website or store, contact our customer support with your order details (order number, purchase date, and reason for return) within our return window (typically 30 days from delivery). We will provide you with instructions for the return – usually this involves us sending you a return merchandise authorization (RMA) number and a shipping label via email.
Once you receive our return instructions, carefully pack the item (including all components and accessories) and ship it back using the provided label. When we receive the returned product and verify its condition, we will process your refund to the original payment method. This usually takes a few days to appear in your account, depending on your bank or card issuer.
If you purchased our product through a marketplace like Amazon or another retailer, you can typically initiate a return through that platform’s own system (for example, Amazon’s Online Return Center). However, you are also welcome to contact us directly for assistance. We can often help facilitate the return or offer support if you’re past the marketplace’s return window but still within our warranty period.
Please note that for a full refund, the item generally should be returned in like-new condition with all original parts. If an item is not defective but you simply changed your mind, it should be undamaged and clean when sent back. We stand by our products, so if you experience any trouble, let us know – our goal is to ensure you are satisfied with your purchase.
We apologize if you received a product that was damaged or if it isn’t working properly – we know that’s frustrating, and we will make it right. If your bidet attachment (or other product) arrived broken, has a manufacturing defect, or fails prematurely, please contact our customer support as soon as possible. Provide us with your order information and describe the issue. Photos or videos of the problem are very helpful as well, because they let us quickly identify what went wrong (for example, a cracked part, a leak point, etc.) and find the best solution for you.
In cases of defective or damaged-on-arrival products, we will typically offer to send you a brand new replacement unit at no cost to you, or if you prefer, a full refund. You won’t be expected to pay return shipping for a defective item – often we either arrange a pickup/return at our expense or simply ask you to dispose of the defective item once the replacement is confirmed working (depending on the situation). Our priority is that you get a fully functional product as soon as possible.
This applies not only to issues on arrival, but also problems that occur during normal use. For example, if after a couple of months of use, a component breaks or the bidet starts leaking due to an internal failure, that would be covered under our warranty (see below). Simply reach out to us with the details, and we’ll take care of it by sending a replacement part or unit. We design our products to be durable, so if something fails unexpectedly, we stand behind it and will help you resolve the issue quickly.
Bottom line: you should expect a high-quality, working product. If you receive anything less, let us know and we’ll fix the situation with as little hassle for you as possible.
Yes, our products come with a warranty. We want you to have peace of mind with your purchase. Our bidet attachments (and most other products) are backed by a warranty of 12 to 18 months from the date of purchase (the exact length may depend on the model – but at minimum, you have one full year of coverage, and many models include an 18-month warranty). This warranty covers any manufacturing defects or malfunctions that occur during normal, intended use of the product.
If your bidet malfunctions or breaks within the warranty period, simply contact us with your order information and a description of the issue. We will typically provide a replacement unit or the necessary parts to fix the problem, free of charge. In some cases, if a replacement is not available, we may offer a refund or an alternative model as a solution. We may ask for a photo or video of the issue just to confirm what’s wrong, but you won’t be put through a complicated claims process – we strive to keep it easy.
Even if your purchase is just outside of the warranty period, we still encourage you to reach out to us. We value our customers and often will try to assist or provide options, even if an issue arises slightly beyond the official coverage window. Our goal is to have happy customers using our products, so we’re often flexible and will work with you to find a satisfactory resolution.
Please note that the warranty covers product failures or defects under normal usage. It wouldn’t cover deliberate damage or misuse (for example, dropping the unit and cracking it, or improper installation causing breakage). Also, modifications to the product might void the warranty. But in general, if you’ve used the product as intended and it stops working correctly within the covered timeframe, you’re entitled to warranty service.
To summarize: we do provide a warranty (check your product manual or our website for the specific duration for your model, usually 1-1.5 years). Just contact us if you need help with a defective product, and we’ll take care of you with a repair, replacement, or refund according to our warranty policy.
Want even more peace of mind? Register as a Samodra member after your purchase and you'll be eligible to extend your warranty from 18 months to 24 months at no extra cost. Registration is quick and easy – just visit our warranty registration page and fill in your order details.
We only ship to physical addresses within the United States.
Most products will be delivered within 5 days of placing the order
Free shipping on all orders within the US!
See full shippping policy
Our refund policy is simple - love our products, or get a full refund. We offer a 30-day trial for all of our gear, which means you have 30 days to try it out, live with it, and love it. If at any point in the first 30 days you decide that you're not 100% satisfied with your new products, get a full refund—no questions asked.
Simply contact us and we’ll get you full refund ASAP!
(No need to mail products)
Our return policy is applicable only to orders placed on https://www.samodrahome.com
Sure thing! Please contact us and we'll take care of you. Really, it's that simple. Heck, we'll even replace your stuff if your house burns down.
Click here to see the full terms and conditions of our 18-month Warranty.
Not a problem! If you have purchased any of our other products from our trusted partners, they are covered by our 18 month warranty - be sure to keep your receipt/order confirmation. That being said, buying items from third parties like eBay will void the warranty.
Product Features
The standard bidet attachments we offer are cold water only. They do not heat the water or mix with a hot water line – they simply use the fresh water from your toilet’s supply line (which is typically cold or room-temperature water). This means when you activate the spray, the water will be the same temperature as the water that fills your toilet tank.
Even though it’s cold water, many users find it perfectly comfortable or at least something you get used to quickly, since the spray is brief and gentle. The bidet does not store water or use electricity, so it doesn’t have a way to heat the water on its own. If having warm water is important to you, we do have certain dual-temperature bidet models (sold separately) that can hook up to your sink’s hot water line or have a warm water connection in addition to the cold. Those models have a temperature control to mix hot and cold so you can get a warm wash. However, those require running a hose to a hot water source like the sink’s pipe, which can be a bit more involved in installation.
For the majority of our attachments (the ones that are ultra-slim and single connection), expect it to run only cold water. There is no electric heating element (so no power plug or batteries needed). If you’re unsure which model you have or whether a warm water feature is included, check the product description or manual – it will clearly state if a hot water connection is an option. But generally, unless it specifically advertises dual temperature, it’s a cold-water bidet.
No – our non-electric bidet attachments do not require any electricity or batteries. They operate purely on water pressure. The water pressure from your home’s plumbing provides all the force needed to operate the spray. You control the flow by turning the bidet’s knob, which adjusts an internal valve to let water spray out or shut it off. Because of this simple mechanical operation, you don’t need to plug the unit in or worry about changing batteries – it’s always ready to go as long as you have running water.
This design makes the bidet very energy-efficient and low-maintenance. There are no electronic parts that could fail or that you need to program. It also means installation is easier (no outlet needed near the toilet). Despite being non-electric, our bidets are designed for optimal performance using household water pressure. They even include safeguards like a built-in backflow prevention valve, so the fresh water line cannot get contaminated by toilet water. In short, the bidet gets all its power from water pressure, making it a simple, eco-friendly addition to your bathroom.
Our bidet attachments typically come with dual spray nozzles and multiple modes for a thorough cleaning experience. Most models have one nozzle aimed for rear cleansing and a second nozzle (or a secondary setting) aimed for frontal/feminine cleansing. You can select the mode by turning the control knob or switch to the appropriate setting. For example, turning the dial one direction might activate the rear wash nozzle, and the other direction might activate the frontal wash nozzle. The water pressure can be adjusted gradually by how far you turn the knob – a gentle turn for a light spray or further for a stronger stream, allowing you to find a comfortable pressure.
In addition to the two wash modes, many of our bidets feature a self-cleaning function. When you set the nozzle control to the “clean” mode, the bidet will rinse off its own nozzles with fresh water. This helps keep the nozzles sanitary by flushing away any residue or debris. Typically, the nozzles are retractable: they stay retracted under a guard or shield when not in use (to keep them clean), and extend only when water is flowing. During self-clean mode, they usually rinse in the shielded position.
The nozzles themselves are often designed to be removable for manual cleaning if ever necessary (for example, they might twist off if you need to descale or wipe them). As for spray reach and aim: the attachment’s position can be adjusted slightly when installing to fine-tune where the spray lands. In general, the dual-nozzle system covers both posterior and anterior wash needs. If your model has a single nozzle, it may have an adjustable angle or different spray patterns to serve the same purpose. But most of our current models do include separate nozzles for feminine hygiene and rear cleaning.
So yes, feminine wash is supported – just switch to the appropriate nozzle setting. All functions are controlled by the one knob (or lever) which is intuitive to use. You’ll find labels or icons on the control panel indicating rear wash, front wash, and nozzle cleaning positions.
Many of our bidet attachment kits include a set of small adhesive pads or bumpers (often silicone or rubber half-moon shaped pieces). These are toilet seat bumpers, and they are provided to ensure your toilet seat stays stable after installing the bidet attachment. Because the bidet attachment fits between your existing seat and the bowl, it adds a slight thickness. This can create a small gap between the seat and the rim of the toilet, especially toward the front of the seat. If left unsupported, when you sit down the seat might flex or “wobble” a bit due to that gap.
The bumpers are the solution to that issue. To use them, first check if your seat indeed has a gap once the bidet is installed. With the bidet in place and the seat down, look at the front underside of your toilet seat – is it resting on the bowl or slightly elevated? If there’s a gap, take the bumpers (they usually have a peel-and-stick adhesive on one side) and attach them to the underside of your toilet seat at the front (or wherever there’s a gap). Typically, you’d place one bumper on each front corner area of the seat underside. Make sure to clean and dry the area before sticking them on so they adhere well.
Once the bumpers are installed, they will contact the porcelain bowl when the seat is down, providing support and eliminating any wobble. This keeps the seat level and stable when you sit on it, distributing weight properly. In addition, it prevents strain on the bidet attachment from the seat flexing. The bumpers are low-profile, barely noticeable, and they protect both the seat and the bidet from damage due to pressure or movement.
If your kit did not include bumpers and you find the seat is lifted, you can purchase similar stick-on toilet seat bumpers at most home improvement stores. But most of our newer models include a couple in the box. Using the bumpers is optional – if your seat rests firmly already, you may not need them – but we strongly recommend using them if there’s any gap. They will make your experience better by keeping everything stable.
Maintaining your bidet attachment is easy and will ensure it stays hygienic and in good working order. Here are some tips for cleaning and maintenance:
- Regular Cleaning: You can clean the exterior of the bidet attachment and the control knob with a soft, damp cloth and mild soap if needed. It’s made of durable ABS plastic (and sometimes metal controls), which is similar to other bathroom fixtures. Avoid using abrasive cleaners, bleach, or harsh chemicals directly on the bidet attachment, as these can degrade the plastic or finish over time. Instead, a gentle bathroom cleaner or dish soap works well. Wipe it down as part of your routine bathroom cleaning.
- Nozzle Self-Cleaning: As mentioned, most of our bidets have a self-clean function. We recommend running the self-cleaning mode periodically (for example, once a week or after heavy use). Simply turn the control knob to the “nozzle cleaning” setting; this causes fresh water to rinse over the nozzles and inside the nozzle guard, washing away any buildup. This helps keep the spray holes from clogging and maintains hygiene.
- Deep Cleaning Nozzles: Occasionally, you might want to manually clean the nozzle(s), especially if you have hard water which can leave mineral deposits. To do this, gently pull down or unscrew the nozzle tip (depending on model) to remove it. You can soak it in a little vinegar and water solution to dissolve mineral scale, then rinse it off. Use a soft toothbrush to scrub any residue from the nozzle holes if necessary. Once clean, reattach the nozzle to the unit. Always be gentle to not misalign or damage the nozzle when removing or reattaching.
- Hose and Connection Checks: It’s a good idea to inspect the hose and connections every so often (say every 6-12 months) just to make sure everything is tight and there are no signs of wear. The hoses are metal-braided and very sturdy, but if you ever notice a fray or a leak starting, turn off the water and contact us for a replacement hose. Likewise, check that the T-valve and all nuts are snug. Normal use shouldn’t loosen anything, but a periodic glance for peace of mind is helpful.
- Winter Care: If you live in an area with extremely cold temperatures and your bathroom is unheated, note that the bidet attachment is connected to your water line. Normally this isn’t an issue (bathrooms in use are typically kept above freezing). But if you were to leave the home unheated in winter or the bidet in an unheated cabin, you’d want to drain the water to prevent any freezing (just as you would winterize pipes). This is only in unusual circumstances – regular home use needs no special winter maintenance.
In summary, treat the bidet as you would other bathroom fixtures: keep it clean with gentle methods, use its self-clean feature, and check moving parts occasionally. There are no cartridges to replace or anything complicated. With basic care, your bidet attachment should remain clean, hygienic, and functional for years. And if you ever notice any issues (like reduced spray force, strange noises, or leaks), refer to our troubleshooting tips or reach out to us – sometimes a quick cleaning or part replacement is all that’s needed.
Our bidet attachment kits are designed to be all-inclusive, so you shouldn’t have to purchase any extra parts in order to install and use the bidet. In the box, you will typically find:
- The bidet attachment unit itself (the flat device that goes under your toilet seat, with control knob and nozzle assembly).
- A brass or stainless steel T-valve (T-adapter) that splits your water supply. This is usually 7/8″ size to fit the toilet’s fill valve.
- A flexible braided water hose to connect the T-valve to the bidet. The hose is sized to match the T-valve (depending on the model – essentially it fits the standard plumbing connections and the bidet inlet).
- Rubber washers and gaskets for all the connections (these are extremely important for a leak-proof seal – each water connection point typically gets a washer, and we include them).
- Toilet seat bumpers (in most models) – small adhesive pads as discussed above to stabilize your seat if needed.
- Mounting hardware if needed (though generally the bidet uses your existing toilet seat bolts, some kits include extra longer bolts or adapters for convenience).
- An installation manual or instruction booklet that diagrams the setup and provides step-by-step guidance (and of course you can always refer to this FAQ or our website for installation help as well!).
- Some kits also include a small roll of Teflon plumber’s tape for you to use on threaded connections if desired, and possibly a wrench tool for tightening the plastic nuts.
In short, you should not need to buy anything else separately in order to install our bidet on a standard toilet. The only “tools” you may need are a screwdriver and wrench from your own toolbox to remove the seat and tighten connections. All plumbing pieces specific to the bidet are provided. If you find that something was missing from your box or if a part was damaged, let us know and we will send you the missing part right away.
On rare occasions, as mentioned in compatibility, if your toilet has non-standard fittings, you might need an alternative adapter (for example, a different size T-connector). But that’s not common, and in such cases you can get that from us or a local hardware store. For the vast majority of customers, everything needed is included and matches your existing plumbing.
So, you shouldn’t have to purchase any extra hoses, valves, or parts to use our bidet. Just install what came with the kit, and you’ll be good to go!
Troubleshooting
If you notice any leaking water after installing or during use of the bidet, don’t worry – most leaks can be resolved with a few checks. First, identify where the leak is coming from, as the fix will depend on the location:
- Leak at a hose or T-valve connection: This is the most common type of leak and usually the easiest to fix. It means water is seeping out at the junctions where components are joined (for example, where the hose connects to the bidet or to the T-valve, or where the T-valve connects to the toilet tank or the supply line). To fix this:
- Leak where the bidet attaches to the toilet (around the base or under the seat): If you see water pooling right under the bidet attachment or around the toilet rim during use, it might be from splash (water hitting the rim if the spray is angled incorrectly) or from an internal leak in the bidet unit.
- Leak from the T-valve itself or cracks in parts: Inspect the T-valve (the metal adapter). If it has a crack or defect, or if any plastic part (like the bidet body or the threads on the inlet) is visibly cracked, do not continue using it.
- Persistent drip from the nozzle or handle (water won’t stop completely): If you find that even when the bidet is “off”, there’s a small stream or drip coming out of the nozzle or around the control knob, this indicates the internal shut-off valve isn’t sealing 100%.
In all cases of leaks, don’t panic – simply shut the water off to stop the leak, then diagnose as above. Most are solved by something as simple as putting in a missing washer or tightening a loose connection. For more serious issues like a defective part, our customer service will promptly help you. We want your bidet to operate leak-free. Once everything is installed correctly and all washers are in place, it should not leak at all under normal conditions. So if you do have a leak, run through these checks or reach out to us, and we’ll get it resolved.
The bidet’s nozzle (or spray arm) is designed to extend when water is flowing and retract back under its guard when you turn it off. If the nozzle is not retracting (meaning it stays down or extended even after the water stops), or it feels like it gets stuck, here are some things to check:
- Water Pressure: The nozzle often relies on water pressure to clean itself and sometimes to help retract. If your home’s water pressure is very low, the nozzle might not be getting a strong enough push to snap back. Ensure that your toilet’s shutoff valve is fully open to allow maximum flow to the bidet. If you are in a building with generally weak water pressure, it might just retract slowly. Usually, though, normal household pressure is sufficient for it to work properly.
- Debris or Hard Water Buildup: Over time, mineral deposits (from hard water) or debris can accumulate around the nozzle hinge or in the nozzle itself. This can cause friction that prevents smooth retraction. Try cleaning the nozzle thoroughly. You can manually pull it down (gently) and use a cloth or soft brush to wipe around the base where it retracts into the attachment. If comfortable, turn the water off, remove the bidet from the toilet, and give the nozzle area a good rinse to dislodge any debris. Use the self-clean function frequently to flush the nozzle.
- Nozzle Cap or Tip Issues: Some nozzles have a cap on the tip (especially if they’re removable for cleaning). If that cap is loose or partially off (for instance, if it got knocked off or not reattached properly after cleaning), it might physically obstruct the nozzle from pulling back in. Inspect the nozzle tip – if a small cap is present, ensure it’s securely clicked on. If it’s fallen off, check if it’s stuck in the guard hole. Reattach it if you find it.
- Mechanical Problem: If the nozzle is still stuck after cleaning and checking the above, there might be an internal mechanical issue (like a spring that assists retraction has failed). In this case, contact us for support. We can guide you through additional troubleshooting, and if needed, we can send a replacement nozzle or entire unit. A nozzle that refuses to retract at all, despite cleaning and normal pressure, is likely a defect we will address under warranty.
In the meantime, if your nozzle is stuck out, you can still use the bidet, but be cautious: the nozzle being extended could get in the way of the toilet’s flush or your movement. It’s best to fix it promptly. Most of the time, a good cleaning solves retraction issues. Keeping the nozzle clean and using the self-clean feature regularly will prevent most causes of sticking. And remember, if you need a hand, we’re here to help get it working smoothly again.
If you turn the bidet’s knob and no water sprays out (or the stream is extremely weak), here are a few things to troubleshoot:
- Water Supply Valve: Verify that the toilet’s main water supply valve (at the wall) is fully open. It’s easy to accidentally leave it partially closed after installation. A partially closed valve will significantly reduce flow, and a fully closed valve of course means no water at all. Turn the knob on the wall counter-clockwise all the way open.
- T-Valve Position (if applicable): Some T-adapters have a little shut-off on the bidet leg (for example, a switch or a screw that can open/close the water going to the bidet hose). Check the T-valve that you installed – if it has a shut-off feature for the bidet line, make sure it is in the open position. (Not all models have this, but a few do for safety.)
- Kinked or Twisted Hose: Look at the hose connecting to the bidet. Is it bent sharply or twisted in a loop? If the hose is kinked, it could be blocking water flow. Adjust the hose to eliminate any kinks. The hose should have a gentle curve with no pinched spots. Also ensure it’s not stretched too tight; if it’s under tension, consider using a longer hose so water can flow freely.
- Clogged Nozzle or Filter: Although it’s rare for a brand new unit, debris from your water line could clog the bidet’s internal valve or nozzle. If you have very low flow, try setting the knob to the nozzle cleaning mode – do you see water coming out then? If not, turn off the water supply, disconnect the bidet hose from the attachment, and briefly crack open the water valve (carefully, just for a second with a bucket under) to see if water comes out of the hose. If water flows freely from the hose, the blockage might be in the bidet attachment itself (possibly at the nozzle). In that case, remove the nozzle tip and check for any debris, or gently poke the spray holes with a toothpick to clear any blockage. Some bidets have a small mesh filter at the inlet – check if your unit has one and rinse it if so.
- General Water Pressure Issues: If water is coming out but weakly, and you’ve verified valves are open and no clogs, it might just be low household water pressure. This is uncommon, but if you suspect your overall water pressure is low (are your sink and shower also weak?), you might need a pressure check in your home. The bidet will only be as strong as the supply pressure allows. As a workaround, you can try turning the bidet knob more (to max) or checking if the supply line or T-valve has any flow restrictor that can be removed. However, our bidets do not include any intentional flow restrictors – they are designed to use full pressure.
After going through these steps, you should have identified the cause. The most common scenario is the water supply was not fully open or something wasn’t connected right. If you’re still not getting water out of the bidet after trying the above, please reach out to our support team. We might walk you through a couple more specific checks, and if the unit itself is faulty, we’ll replace it. But usually, once everything is open and clear, the bidet should spray strongly. Remember, it’s a simple system – water goes from the valve, through the hose, and out the nozzle. So the issue will be somewhere along that path (closed valve, kinked hose, clogged nozzle, etc.), and once fixed, you’ll be back in business with a nice spray.
If you find that after turning the bidet knob to the off position, water is still coming out (even just a steady drip or thin stream), that means the internal shutoff valve in the bidet isn’t sealing properly. Here’s what you can do:
- Double-check the knob position: Make sure the knob is truly in the off spot. On some models, the off position is marked, or you can feel a slight click/stop when it’s fully closed. If it’s slightly misaligned, turn it gently until you can’t turn it further. (Many of us do this instinctively, but it’s always good to verify.)
- Release pressure and reset: Turn off the toilet’s water supply at the wall. Then turn the bidet knob on and off a couple of times to release any built-up water pressure. This sometimes can reseat the internal valve if a small piece of debris was causing it not to close fully. After that, turn the water supply back on and see if the issue persists.
- Inspect for debris: Occasionally, a bit of sediment from the water line might get stuck in the bidet’s valve. If you’re handy, you could disconnect the water supply, remove the bidet from the toilet, and inspect the inlet/valve area for any debris. Rinsing the unit out might dislodge any dirt. However, this can be a bit involved and it’s not something we expect customers to always do – it’s just an option if you’re comfortable.
- Contact support for a replacement: If after trying the above the bidet still drips or runs when “off”, then the unit likely has a faulty internal valve. In this case, it’s not something you can fix permanently on your own, and we will replace the defective part/unit under warranty. Continue to keep the water supply off when not in use, to avoid wasting water, and reach out to us. We’ll send a new bidet or the necessary parts. This kind of issue is rare, but it can happen and is definitely covered by us.
A properly working bidet should stop water completely when off, with no drips. So if yours doesn’t, please take advantage of our support. We want you to have a hassle-free experience. The above steps are mostly to rule out any minor, easily fixable causes (like an unclosed valve or a bit of gunk). If they don’t solve it, you’ll get a new one from us that works correctly.
If your toilet seat doesn’t sit flush on the bowl or it wobbles a bit after the bidet attachment is installed, don’t worry – this is a common occurrence with any bidet attachment and is easy to resolve. The issue is simply that the attachment adds a little thickness under the seat, which can create a small gap between the seat and the rim of the toilet (usually toward the front of the toilet). Here’s how to fix it:
- Use the included bumpers: As discussed in the Product Features section, we include adhesive bumpers in most kits. These bumpers should be attached to the underside of your toilet seat, toward the front, to support the seat. Once you stick those on and close the seat, they will touch the bowl and eliminate the gap, making the seat stable again. This is the quickest and best solution.
- Adjust seat and attachment alignment: Sometimes simply loosening the seat bolts slightly and repositioning the bidet attachment can help the seat sit more evenly. Ensure the attachment is centered and not skewing the seat. Tighten everything down again and check stability.
- If you don’t have bumpers handy: You can get toilet seat bumpers from any hardware store. They are inexpensive and come in various thicknesses. Choose ones about the thickness of the bidet attachment (usually around 1/4 inch or 5mm thick). Apply them as needed so the seat has additional contact points with the bowl.
- Check bolt tightness: A wobbly seat could also mean the seat bolts are not fully tightened. After adding the bidet, sometimes the bolts need an extra turn. Carefully tighten the seat mounting bolts (not too hard, as over-tightening can crack porcelain or the plastic bolts). Snug them and that, combined with bumpers, should firm everything up.
After these fixes, your toilet seat should be as stable as it was before installing the bidet. It’s important to address any wobble because it not only feels better but also prevents undue stress on the bidet attachment. With the seat properly supported, the bidet will stay securely in place and you’ll have a comfortable experience. So, definitely use those bumpers and adjustments – they make a big difference!
Orders & Shipping
We know you’re eager to get your product, so we strive to process and ship orders as quickly as possible. Typically, there is a processing time of about 1-2 business days from when you place your order to when it ships out (often faster). Once your order is shipped, delivery time will depend on the shipping method and your location:
- Standard Shipping: Usually takes about 3-7 business days for domestic deliveries. For example, within the continental US, most customers receive their package within a week or less after shipment.
- Expedited Shipping: If you chose an expedited option (like 2-day shipping), it will arrive faster, typically in the promised timeframe (2 business days after shipment for 2-day, etc.). We hand off the package to the carrier quickly so they can get it to you on schedule.
- International Shipping: Delivery times vary more if you are outside the country of origin. It could range anywhere from 1-2 weeks depending on customs and local postal services, unless a specific express international method was chosen.
As soon as your order ships, we will send you a shipping confirmation email. In that email, you will find a tracking number and a link to track the package. You can click that link, or copy the tracking number and enter it on the carrier’s website (for example, UPS, FedEx, DHL, or USPS) to see the status of your delivery. The tracking information will let you know when the package is picked up, in transit, and out for delivery, and it will provide an estimated delivery date.
If you have an account on our website, you can also log in and check your order status there. It will show if the order is processing or shipped, and it may display tracking details as well. For marketplace orders (like Amazon), the tracking can be found in your order details on their site and you’ll likely get an email from them too.
So in summary: you should receive a tracking number within a day or two of placing your order (once it ships). Use that to follow your package’s journey. If you haven’t received any shipping confirmation after a couple of days, make sure to check your spam/junk email folder, or you can contact us to inquire. We’re happy to update you on your order status. We want to make sure you get your bidet promptly and can start enjoying it!
If your order is taking longer than expected or the tracking information isn’t updating, we’re here to help. Here’s what to do if you suspect a delay or loss:
- Check the Tracking Updates: First, click on your tracking number link to see the latest scan events. Sometimes packages get temporarily delayed in transit (due to weather, high volume seasons, etc.), and the carrier’s tracking will note a delay or give a new estimated date. If the tracking shows it’s still in transit but late, it might just need a little more time.
- Look for Delivery Attempt Notices: If tracking shows “delivered” but you don’t have it, or if it shows an attempted delivery (e.g., no one home, or couldn’t access your address), there might be a notice. Check around your property to see if the package was left in an unexpected spot (behind a planter, at a back door, with a neighbor, etc.). Also check for a door tag or notice from the courier if they tried to deliver when you were out.
- Contact the Carrier: If the tracking info is confusing or hasn’t updated in many days, you can reach out to the shipping carrier’s customer service with your tracking number. Sometimes they can provide more insight or locate a stalled package. They might be able to tell you if the package is held at a local post office or depot awaiting pickup, for example.
- Contact Us: If you’ve tried the above or prefer we handle it, just get in touch with our customer support. Provide your order number and tracking number, and explain the situation. We can investigate from our end. We might open a case with the carrier to trace the package. If it appears the package is truly lost in transit or has gone missing, we will absolutely take care of you – typically by sending a replacement order out to you immediately (at no cost, of course). We’ll work out the details with the courier on our side so you’re not stuck waiting.
We understand it’s frustrating to wait for a package that’s late or lost. Rest assured, we will do everything we can to locate it or send you a new one. Your satisfaction is important, and you will either receive your original item or a replacement. Lost packages are rare, but we have procedures in place to handle it quickly when it does happen. So, just reach out if you suspect something’s wrong with the delivery, and we’ll get it sorted out for you.
All our products should arrive with every part and accessory included, but on rare occasions a mistake can happen (or a small part might be overlooked when unboxing). If you open your package and discover that a part is missing – for example, a hose, T-valve, set of washers, or even the instruction manual – here’s what to do:
- Double-Check Packaging: First, take a good look through all the packing material. Small parts like washers, tape, or even the user manual can sometimes be tucked in between cardboard or at the bottom of the box. It’s possible for things to hide in the corners of the packaging. Make sure nothing is stuck to the tape or inside the folded cardboard flaps.
- Check All Components Against the List: Refer to the instruction booklet (if you have it) or the product listing which often enumerates all included parts. Identify exactly which part is missing. This helps when you contact us, so we know what to send. For example, “the 7/8 inch T-adapter is missing” or “the bag of rubber washers wasn’t in the box.”
- Contact Our Customer Support: Reach out to us via email or phone (whichever is convenient) and let us know your order details and which part was missing. We sincerely apologize for the oversight, and we will rectify it immediately. We keep inventory of spare parts and can dispatch the missing item to you right away.
- No Extra Cost or Hassle: If a part was missing due to our packing error, we will ship you the missing piece at no charge, of course. You do not need to return the whole product or anything – just let us know and we’ll send the part. We usually ship the missing component with expedited service so you’re not waiting too long to fully use your product.
Missing items are uncommon as we have checks in place during packaging, but it can happen and we understand it’s inconvenient. We take such issues seriously and will resolve them as fast as possible. Whether it’s a washer, a hose, or an instruction booklet, we’ll make sure you get what you need. Our support team might also provide a digital copy of the manual or guide you through installation if you’re missing the instructions and need help right away. You’ll be taken care of promptly.
If you need an official invoice or receipt for your purchase (for example, for business reimbursement or VAT purposes), we can certainly provide that. Here’s how to get your invoice:
- For Website Orders: If you ordered through our official website, you should receive an order confirmation email that often serves as a basic receipt. However, if you need a more detailed invoice (with our company information, tax breakdown, etc.), just contact our support team and request an invoice for your order. Provide your order number and any specific details you need on the invoice (like billing address or VAT number). We will email you a PDF invoice that includes all the necessary information.
- For Amazon or Marketplace Orders: If you purchased on Amazon, you can usually get an invoice through your Amazon account by clicking “Invoice” on the order details page. If for some reason it’s not available or you need it in a different format, reach out to us (the seller). We have access to generate an invoice for your Amazon order as well. We’ve gotten many such requests (in various languages, too!), and we’re happy to email you the invoice promptly. The same goes for other marketplaces – just send us a message with your order number and we’ll send back the invoice.
- What the Invoice Includes: Our invoice will include our company name and address, your order date and number, the item(s) purchased with prices, any taxes (like sales tax or VAT if applicable), and the total amount paid. It will usually be in PDF format on our letterhead. This is suitable for accounting or tax purposes.
- Timing: Feel free to request the invoice as soon as your order is delivered (or even right after ordering if needed). We typically respond quickly to these requests, usually within 1 business day. If you need an invoice urgently, you can mention that and we’ll do our best to expedite it.
We understand many customers, especially in certain countries, require a formal invoice. It’s no problem at all – just ask us and we’ll provide it. If you did not receive an invoice automatically or can’t find it, we’ll make sure you get one. Your proof of purchase will be documented for you.


Still need help? If you can’t find the answer here, feel free to contact us via email or phone—we’re happy to assist.